Edit Suite Workflow Tips - How to use boards to organise your documentary edit
Keeping in the middle of the road at all times is quite the challenge when you are deep in a long form documentary edit.
The headlights can also shine on your draining sanity too.
The journey is not a straight road as you can veer in many different directions but what you don’t want to experience (in large amounts), is a feeling of getting lost and then confused. Then getting lost again in a sea of rushes.
There is never a perfect route but you can plot your course which allows connections in the narrative to appear and up sprouts a glimpse of productive coherence that enables your creative documentary editing process.
Patterns emerge and story arcs can suddenly develop after many a long night assembling and reassembling scenes.
For me, a lot of those breakthroughs appear not on the actual screen but on physical parts of paper or virtual boards.
It creates a space where I am not scrubbing the playhead up and down several timelines, at varying speeds to entice some type of edit chemistry to spark.
I would advise to slot into your documentary editing workflow an order of a large marker, coloured cards and a pin board with rather sturdy pins.
In this working from home world we are now in, my walls are post-it note free as I have purchased two easels which support the boards and in another revelation of the way I used to live, the cups of tea are now wildly cheaper (and larger).
This board work may seem slightly amateur for some. Surely I brandish large online databases overflowing with descriptions and metadata, so when I shout at my screen automatically all the information I need is presented by an AI tool.
Well I sort of have that in my portfolio too but it’s still very much pre-AI.
I know there are film and documentary editors who apply a lot of detail in the metadata fields in the actual video editing software and that works sufficiently for them.
Admittedly I tend to use markers (the ones in the edit software) a lot for this and apply descriptions in those fields but the majority of my note taking takes place away from the edit programme. I release it into the wilds of a logbook from FileMaker Pro (thank you Mr Murch for introducing me to this), however if you are adept at Excel or Pages that can also work effectively too.
Within this logbook, or in an Excel/Pages workbook, I enter all the shots with their corresponding names, then add descriptions of the shots, for example dialogue extracts from certain characters, notable physical signs, changes in daytime etc. I may input CHARACTER (S) as one column, LOCATION as another then within the DESCRIPTION column, type information about what is happening in the shot.
Here is an example of how you might produce this in Excel or in Pages.

You may think this is an exhaustive way of cataloguing but it can provide that all essential safety ring, guiding you back to sanity and narrative planning. You can read on paper what ingredients are present for your film and suddenly patterns and connections develop.
Also this level of detail informs the paper edit process. Just the ability to search for keywords, whether it is character or location, is always superbly useful and saves you hours when you stare at the screen, hyper clicking the mouse internally declaring “I know it is in here somewhere.”
Prepare To Mount A Picture Board
With this level of detail propping up your paper and physical edit… you are now fully equipped to begin the board work.
Take out those large pins.
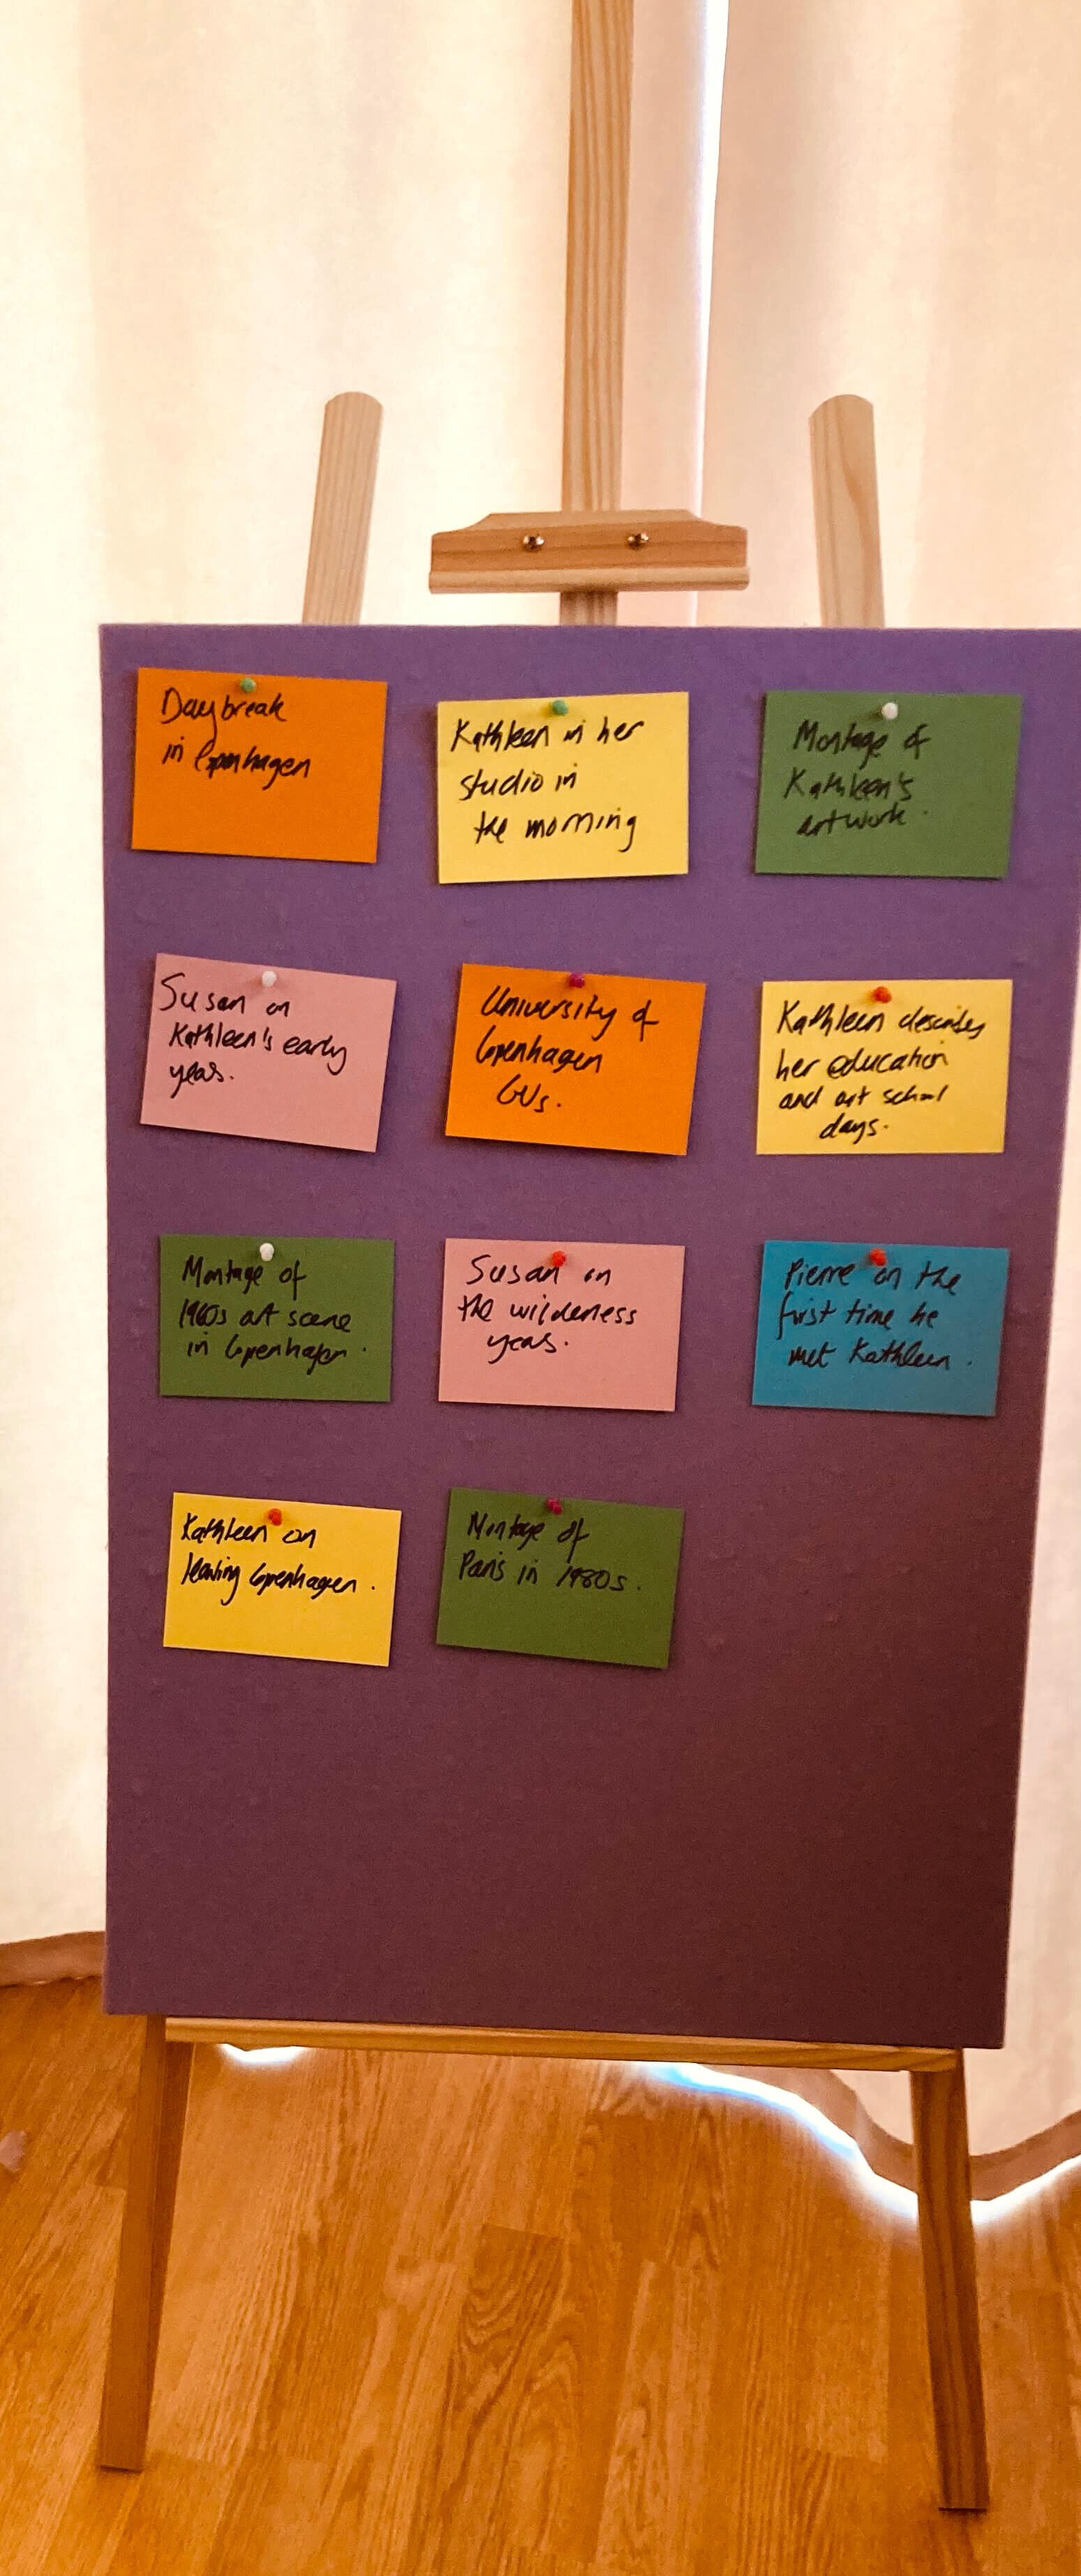
Simply purchase a whole batch of coloured cards and appropriate a theme or character to each colour and start to plot that narrative development on a board.

Colourful cards ready to be pinned on that board
This essentially is your story structure overview with key words written onto the cards.
Then when you have completed your story structure, it’s a great way to gauge what *exactly* is happening in the story.
Do you have too much of one character and another who doesn’t feature that regularly? Does the main action happen too late in the current running order - should it be moved up sooner?
Make that board into a work of art as you will be staring at it several times a day. Shifting the cards around.
Removing some and then adding others.
Renaming and rewriting.
Ripping up ones and piecing ones back together. It’s a constant flow backwards and forwards and around and around.
For the boards - I purchased mine via TeacherBoards.
I tend to work left to right on mine - so horizontal lines, you may find vertical works better for you.
Then usually about 2/3’s of the way into the edit, after the documentary assembly, I transfer this board online. You can then begin to share it with your team.
My current favourite tool for this is Milanote - which is a virtual noticeboard easy to use and easy to share. I would imagine that there are a host of other virtual board options out there too.
It sounds such a simple part of the process but you will quickly find the board is a practical and effective way to keep you on track.
I prefer to work this way - to have my time in the video edit software shaping and sculpting but to also have my route plotter outside of the software, in its own space, preferably where I can stare at it and hope for some inspiration.
As Lao Tzu said - “A journey of a thousand miles begins with a single step” - make that step your first card on your board… Many cards will follow - some will stay, some will be packed neatly away, others with float right out of your peripheral vision - serving as a bridge that helped you on your journey but can now be released into that space of never quite made it. Thank you again you little warrior.
Then when you stagger over the picture lock line, hit export, pour a drink, turn around to face that board and see your story structure in all its felt tip glory.